

Imagine the growl of a finely tuned engine, the kind that turns heads on every street corner. JDM, or Japanese Domestic Market engines, have become a symbol of high performance and reliability. In a world where gearheads yearn for unique power, a JDM engine swap is a rite of passage.
But what exactly entails dropping a JDM heart into your beloved ride? From the raw power and efficiency to the nuances of compatibility, understanding the basics is essential before wrenches start to turn. Choosing the right JDM engine is more than a matter of horsepower; it's a pursuit of harmony between machine and ambition.
This guide is your first step into the world of engine swapping – where the roar of Japanese engineering comes to life under your hood. Addressing everything from tool selection to the precision of installation, you're about to delve into an accessible approach to upgrading your vehicle's performance. Let's embark on the journey of transforming your drive with a JDM engine swap made easy.
What is a JDM Engine Swap?

A JDM engine swap refers to the process of replacing an original engine in a vehicle with a Japanese Domestic Market (JDM) engine. These JDM engines are sought after for their high performance, reliability, and often, a better value compared to buying new, domestic engines from dealers.
While most JDM engines come from performance-oriented cars sold in Japan, they can be used to boost horsepower, improve handling, or simply extend the life of the vehicle with a fresher engine. Many enthusiasts opt for a JDM engine swap because Japanese engines can provide a solid foundation for further modifications, like those found in the revered Honda K series which boasts advanced VTEC controls.
Importers such as JDM West Coast facilitate access to a spectrum of JDM engines and support components. When planning an engine swap, key components to consider include the intake manifold, exhaust manifolds, valve cover gaskets, and the AC compressor. It's essential to ensure the complete engine package is compatible with the engine bay and that the swap includes necessary parts like the wiring harness and swap kits.
Remember, a JDM engine swap is not just about dropping a powerful engine into your car; it's also about understanding and integrating the right components for optimal performance and reliability.
Choosing the Right Engine
Embarking on an engine replacement adventure starts with a critical decision: choosing the right engine. As delineated in the resourceful "JDM Engine Secrets," it's pivotal to have a clear plan to tackle the intricacies of engine selection. This approach mitigates the stress and confusion often associated with navigating through the vast sea of JDM possibilities. One of the sublime perks of JDM engine swaps is their financial allure, presenting a tantalizing cost-effective alternative to purchasing new engines or transmissions from dealerships, particularly for those diving into car modification projects.
One of the non-negotiable steps when procuring a JDM engine is to request detailed leak-down test results, a step that dives deeper than a surface-level compression check. This ensures that the bottom end of the engine is robust and ready to run as-is. Compounding considerations like electronics, sensors, and engine management systems dictate the harmonious union between the chosen JDM engine and your vehicle. Moreover, the fiscal savviness of a buyer must extend beyond the initial engine cost to account for potential additional expenses entailed in swap components and possibly transmission alterations.
Identifying Your Needs and Goals
Just like an artist selects the right paints for their palette, a car enthusiast must identify their specific needs and goals before selecting a JDM engine. Honda aficionados might lean towards the B18C1 engine, finding solace in its established performance and often lower costs in comparison to newer i-VTEC DOHC engines such as the K20. Honda's mechanical camaraderie, marked by their shared configurations, mounts, and electrical connections, simplifies the engine swapping process.
For enthusiasts set on a Subaru, the allure of the JDM turbo EJ or STI engine is irrefutable, promising not just a surge in performance but also paving the way for a potential six-speed transmission upgrade. Passing smog tests, an imperative consideration in many regions, can be achievable with the right modifications to the newly transplanted heart. The quest for power is the driving force for many, necessitating scrupulous preparation, including the removal of the factory engine and organizing a suitable workspace.
Researching Different JDM Engines
When the canvas of your engine bay awaits a new masterpiece, the research phase commences. Enthusiasts frequently cast their votes for engines like the Nissan SR20DET, Toyota 2JZ-GTE, or the Honda K-series, with each candidate promising a unique set of attributes, whether it's raw horsepower, improved fuel efficiency, or a taste of Japanese market exclusivity.
Prospective engine swappers are wise to temper their excitement with the understanding that while JDM engines are renowned for lower mileage, this metric isn't always the sole indicator of condition due to Japan's notorious stop-and-go driving environment. Selecting a JDM engine for your vehicle goes beyond superficial compatibility; it involves a meticulous match-making process, avoiding features like AVCS or AVLS if your vehicle's ECU turns a blind eye to them.
Upon the engine's arrival, it's incumbent upon the new owner to conduct an inspection marathon, leaving no intake plenum unturned. Looking out for red flags, such as clogging in the oil sump or the presence of metal shavings, can save a world of inconvenience down the road. After all, discovering these issues after installation is as desirable as a backseat driver on your maiden voyage with your newly swapped JDM powerplant.
Gathering Necessary Tools and Equipment
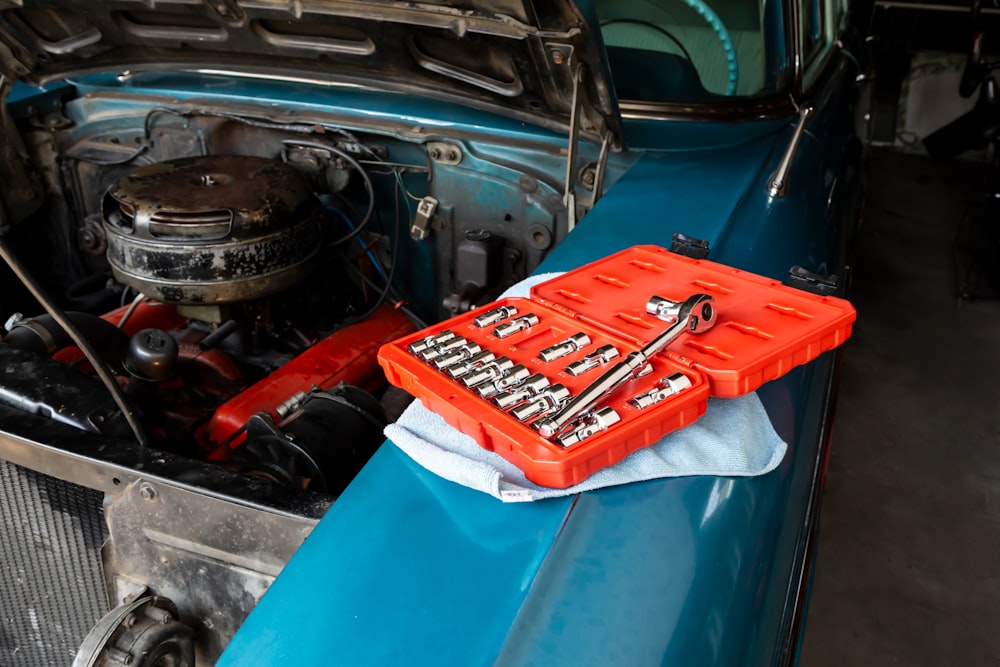
Before diving headfirst into the technical dance of a JDM engine swap, it is paramount to equip your garage with an arsenal of the appropriate tools for the task ahead. A successful engine swap is akin to a well-orchestrated ballet, with each tool playing a critical role in the performance. Begin by ensuring a clean, orderly workspace, devoid of clutter that could disrupt the operation. Your basic necessities should include a comprehensive wrench set, several sizes of ratchets and sockets, a range of screwdrivers, breaker bars for stubborn bolts, and an array of pliers for those tricky clips and hoses. An impact wrench can be invaluable, saving time and physical strain during disassembly and reassembly.
Anticipate the disconnection process; you'll be unplugging a spaghetti mess of electrical wiring, detaching various hoses, including coolant and fuel lines, and removing the exhaust system and transmission mounts. Specialized tasks may call for specialized tools, so confirm your needs in advance to avoid mid-project runs to the hardware store.
Engine Hoist
Amid the heart of your engine swapping project is the engine hoist – a device no less important than the engine itself. A sturdy engine hoist isn't just an option; it's an absolute necessity for heaving the heart of your vehicle out from its confines. When maneuvering the engine, be vigilant to prevent it from playing bumper cars with other components in the engine bay. Often, removing the engine is a two-person job, so enlist a friend or hire help to manage this heavyweight step with the care it demands.
Your goal should be to detach the engine gracefully from the transmission, which means easing out bell housing bolts with a gentle, calculated touch. Once free, the engine hoist will bear the weight of the engine, guiding it out of its former home and into the workspace where you continue the process.
Engine Stand
Upon the engine's liberation from the vehicle, an engine stand becomes your next best ally. This unsung hero of engine swapping ensures the engine remains secure and maneuverable, providing 360 degrees of access for inspection and modification. The engine stand allows you to perform adjustments to the wiring harness, examine the condition of the motor carefully, and replace any components with ease. Remember, the stand must be strong enough to hold your engine of choice, be it a turbocharged beast or a high-revving screamer.
During the tear-down phase, you'll marvel at the convenience of having your removed engine upright and on display. Tasks like swapping out valve covers or fitting a new intake manifold become significantly less back-breaking. Such a stable platform also aids in the precise alignment required when attaching the engine back to the gearbox.
Wiring Harness
In the delicate world of JDM engine swaps, a wiring harness can sometimes be the bane of an enthusiast's existence. Given JDM engines can come with minor to major electrical differences compared to their domestic counterparts, using the stock wiring harness with proper adaptations is crucial. You may find yourself extending some wires, re-routing others, or identifying new homes for sensors whose connections don't line up with your setup.
For example, reconfiguring the harness to ensure the coil packs don't misfire or efficiently extending the coolant temperature sensor wires to reach their new location can be a test of patience and electrical knowledge. Those leasing a slice of their souls to the pursuit of custom engine swaps must not skimp on the demands of a wiring harness – it's the electric lifeline between your JDM heart and its new body.
Swap Kits
Whether you're embarking on your inaugural engine swap project or you're a seasoned veteran, swap kits play a pivotal role in streamlining the process. Various companies, advising from a wealth of JDM West Coast experience, market these kits, embedding them with the key components needed for a domestic car to welcome a Japanese engine. These kits often include mounting brackets, transmission adaptors, and custom intake plenum sections - all aiming to transform a complex custom job into a manageable DIY project.
Swap kits articulate a solution to the endless variables in engine swapping projects. Cooling hoses that snake around your new engine bay, mounts that bolt up without drilling new holes, and even tailor-made wiring harness extensions harness their ability to shave hours, if not days, off your engine replacement. Always ensure you follow the provided installation guide, as the tiniest oversight can magnify into a driveability or safety issue in the JDM-engine-swapped beast you're creating.
Removing the Old Engine

When taking on the challenge of a JDM engine swap, the removal of the old engine is a task that demands precision, patience, and preparation. Referencing the manufacturer's manual is the first step to ensure you're following the correct procedures specific to your vehicle. Each bolt, hose, and wire is a piece of the puzzle you'll need to reassemble later, so labeling them as you go will save you from future headaches.
Handling the original engine with care during the extraction is paramount to avoid any damage to the surrounding parts of the car. This includes being mindful of the car's body, wiring, and any other components within the engine bay. Once the engine is out, it's vital to add fresh fluids to the new engine. This step isn’t just for the sake of being thorough; it's necessary to ensure the engine operates correctly after the swap. And remember, the time and effort invested here can lead to increased horsepower and improved overall vehicle performance, making your project worthwhile.
Disconnecting Electrical Connections
The disentanglement of electrical connections is a critical step in the engine removal process. Before proceeding, ensure the battery is disconnected to avoid any electrical mishaps. Then, begin with meticulously detaching all electrical wires linked to the engine. Labeling these connectors as you unplug them cannot be overstressed—it’s a step that streamlines reassembly and keeps confusion to a minimum.
Review the manufacturer's manual to ensure all electrical connectors are properly disconnected. This includes sensors, the ECU, and any auxiliary wiring. Proper disconnection of these elements is crucial to a successful JDM engine swap and will prevent potential electrical issues in the new engine arrangement.
Disconnecting Fuel Lines
In preparation for disconnecting fuel lines, caution must be your guiding principle to avoid potentially hazardous spills. Start by running the engine after removing the fuel cap and hose until it ceases, which ensures the lines are depressurized. Cooling lines, hoses, and other related parts should follow suit. Keeping a sharpie and labels at hand to tag each part as it's disconnected can greatly reduce the complexity of the reassembly process.
To retain continuity, consider using the original engine's injectors and fuel rail when possible, minimizing the modifications needed in the fuel system. It’s also essential to drain all the fluids from the car before proceeding with the engine removal, including oil and antifreeze. Secure management of fuel lines is non-negotiable for a safe and clean JDM engine swap project.
Removing Exhaust Manifolds
The removal of the exhaust manifolds starts with meticulous detachment from the affected components, taking care to unbolt parts such as the catalytic converter slowly and carefully. Each vehicle may offer its own challenges like encountering parts that obstruct easy removal, which can include the steering shaft or a suspension torsion bar. In these cases, a keen eye and modifications are necessary, potentially requiring custom fabrication.
As you venture into the engine swap's exhaust system disassembly, you may discover that some custom work with stainless steel tubing is required to navigate around vehicle-specific impediments. During this phase, a professional's welding or fabrication skills might be of the essence to ensure the new exhaust setup fits perfectly within the engine bay's confines. This step is integral to the sequence of operations in a successful JDM engine swap, tasking you with ensuring that your new powerplant breathes just as well as it runs.
Installing the JDM Engine

Embarking on the JDM engine swap journey requires meticulous attention to detail during the installation process. An essential aspect of a seamless transition is ensuring that the JDM engine remains compatible with the vehicle’s original computer system. Retaining the original exhaust and intake manifolds can significantly aid in this compatibility, preventing the car's computer from registering drastic changes.
When introducing a JDM engine with a Japanese spec PCM and cut wiring harness, it is apparent that a certain degree of electrical finesse will be needed. You may find yourself in the midst of some creative wire splicing or sensor substituting to make everything play nicely together. It is also worth noting that in some regions, fitting a JDM engine into your car may make it subject to being registered as a vehicle with a salvaged title. This requires due diligence on your part to ensure legal roadworthiness.
During the engine mount-up, you'll likely need to swap certain domestic engine components onto the JDM powerplant. These could include the top intake plenum, accessory brackets, and the crank sensor, contributing to successful integration within the new host vehicle. It's not unusual for slight modifications to surface as requirements – adjusting the engine harness or shimming the starter to fit just right. Remember, it's the small details that can make or break the premium performance of your JDM swap.
Installing Intake Manifold
Introducing the intake manifold to your JDM engine signals a merger of power and precision. The right approach involves fitting new gaskets and possibly re-drilling mounting holes — a reality when working with JDM engines like the Pulsar GTIR SR20DET throttles on an S13 SR20 head. The alignment with the ECU is paramount, meaning the integration often benefits from reusing the USDM engine's original manifold and sensors to charm the ECU into cooperation.
Positioning during installation is critical — the cold air inlet must be kept safe from water's reach to avoid any catastrophic engine damage caused by hydro-locking. Rest assured, your custom engine swap may make room for minor clearances; however, the intake plenum typically respects the surrounding components such as the brake booster. Lastly, ensuring a tightly sealed system void of vacuum leaks is critical in maintaining the engine's performance post-swap.
Connecting Wiring Harness
The wiring harness serves as the nervous system of the engine swap, demanding precision and compatibility. Embracing the original wire harness is often the recommended path, offering a plug-and-play experience that negates the need for extensive modifications. Nevertheless, solutions like aligning and extending wires to accommodate sensor placements may be par for the course when integrating the JDM alternative.
Transferring the vital connectors and ancillary components from the domestic engine to the JDM unit — such as the injector sub-harness — can provide smooth operation without major electrical interventions. But remember, this electronic integration does not come cheap; acquiring the US-specific ECU, MAF sensor, and injectors can add to the tab, nudging the budget upward by an estimated $1,500 or more.
Installing AC Compressor
The AC compressor, while seemingly a minor player, demands its due diligence during a JDM engine swap. The size and specifications of the JDM compressor may vary from the original US version, calling for an adjustment period as the swap takes shape. It is not uncommon to temporarily sideline the AC compressor to streamline the installation process, only to revisit it for proper fitting later.
Differences in size and setup of AC components need thorough evaluation to ensure the JDM engine nestles into your car with ease. While achieving the desired clearance for the JDM engine in the bay, close attention to accurately fitting and securing the AC compressor will help maintain the vehicle’s comfort features, completing the transformation with cool efficiency.
Testing and Troubleshooting
Once you've got your JDM engine secured in the engine bay and all the key components bolted in, the testing and troubleshooting phase begins. The excitement of a powerful engine swap like the SR20DET or the 2JZ-GTE under your hood is palpable, but you're not quite at the finish line yet.
Start by checking for diagnostic trouble codes, such as the notorious P0300 which signals random misfires. This could point you toward a misstep in connecting ignition coils or spark plugs. Next, ensure that your new setup, including the fuel injectors and rails, correspond with the right portions of the wiring harness. Misfires and electrical oddities can often be traced back to these connections.
Given that the engine replacement phase can make your car a "Frankenstein" of sorts, state emissions and environmental guidelines can't be ignored. Some states, like California, have stringent rules that may impact the legality of your engine swap project.
Checking for Leaks
Before you take your newly boosted ride out for a victory lap, the prudent move is a thorough leakdown test. This vital step will unveil the true condition of the engine and is necessary before replacing any vital gaskets or seals.
Common areas for leaks include the usual suspects: the timing belt, water pump, head gaskets, and at various seal points such as those around the camshaft, valves and intake, and exhaust manifolds. Don't just settle for the basic fix; reach for top-notch head gaskets like those from Cometic to replace the more pedestrian factory-installed gaskets that might not stand up to the rigors your new powerplant will face.
Checking for Electrical Issues
An engine that won't start immediately post-swap can quickly dampen your enthusiasm. Start with verifying spark, fuel, and compression. A lack of spark oftentimes points to a troublesome coil pack that isn't delivering the electrical punch your spark plugs need.
For those tricky sensor and wiring scenarios, don't shy away from transplanting sensors from your stock engine if you suspect the JDM unit's sensors are faulty. This swap can oftentimes be performed without any wire slicing or connector modifications when you've opted to reuse your intake manifold.
Should your electrical troubleshooting reveal deeper issues, consider a once-over on replacement parts that are known to cause issues, like the rear main seal, crankshaft front seal, and the water pump. These preemptive strikes can save you from gremlins creeping into your swap down the road.
Tuning the Engine
With the JDM engine securely swapped and tested, tuning beckons. Some engines, like the Honda K-series, are engineering marvels with features like variable valve timing and lift electronic control (VTEC) and electronically controlled cam phasing. These systems promise serious performance boosts when tweaked correctly.
Tuning these engines isn't just about strapping on bigger turbos or tweaking ECU maps. Often, you'll need to contend with custom engine mounts, rejiggered engine management systems, and some serious wiring work, especially when fitting a beefy powerplant where it wasn’t meant to go, like wedging a Honda F-Series into a different maker's chassis.
JDM West Coast
If you are considering a JDM engine swap, look no further than JDM West Coast, the premier supplier of Japanese Domestic Market motors. Visit JDM West Coast today to explore their wide selection of JDM engines and auto parts and get started on your engine swap journey.